Showing posts with label Illustrator. Show all posts

Tuesday, February 28, 2023

New spins on some older art

   The time came for me to create a webpage for myself: https://andrewmoir.art.  I also started an Instagram: https://www.instagram.com/andrew_w_moir/.  It pained me to deactivate my DeviantArt after 10+ years, but between the AI and the lewd junk, the real art became harder to find.  Maybe I'll try an ArtStation and see how that goes.
   I'm in the process of revamping older Adobe Illustrator pieces with Inkscape.  Inkscape needs a lot of development to perform anywhere near Illustrator, but the pricetag (free) had me hooked.


Saturday, August 28, 2021

Dreamcatcher Creatures


Dreamcatcher

    A co-worker commissioned me to Illustrate her dreamcatcher concept, incorporating different creatures she came to appreciate while studying biology. She wanted something like the minimalist bird and seahorse illustrations I’ve done. I didn't know how challenging this would turn out, but we both liked the results.

    She requested certain creatures: an eagle ray, a spotted salamander, a crane, a caddisfly or dragonfly (my choice), a rainbow trout, and a fathead minnow. For the dangling items, she suggested snail shells, shark teeth, and pinecones. I added feathers also since dreamcatchers usually feature those.


Caddisfly

Crane

Eagle Ray

Fathead Minnow

    Pattern Swatch: I created the eagle ray's dots, dots on the feathers hanging from the bottom, and the fathead minnow's scales with Pattern Swatches. The art you create will tile infinitely inside the shape you assign it to.

The dot pattern: Create a white dot on a black square then follow steps 4-5.  Take note of item 3.1.
The X pattern: See the diagram below, which shows how to create a seamless tiling pattern.

  1. Create a square with no fill or border that the X will fit into
  2. Create long, thin rectangles with pointed ends, like a pencil sharpened on both ends
  3. Rotate the rectangles 45 degrees. The points will go into the corners of the box
    1. You’ll see a space where the corners or edges of the swatches don’t connect if you don’t get it right
  4. Open the Swatches palette, and drag and drop the shapes onto an open space on the palette to create a new swatch
    1. This action will create a little icon of your new swatch, which you'll see at the end of the other swatches in the Swatch palette
  5. Create the shapes that will receive the pattern 
  6. Select the shape and click on the dot swatch or the X swatch, which will apply the pattern to the selected shapes

    You can then move/rotate/reflect/scale/shear the pattern inside the shape, without affecting the actual shape, by selecting Transform Pattern Tiles in the General Preferences, or when you right-click > Transform > Move (or Rotate/Reflect/Scale/Shear) and select Patterns in the Object section.

The X Pattern

Rainbow Trout

    Art Brush: For the rainbow trout, I made the fins detail—the row of ovals—, with an Art Brush.

  1. Create a black oval
  2. Shift + Alt-drag to make a copy of the oval
  3. Scale down the second oval
  4. Select both ovals and use the Blend command, with "5" in the Specified Steps window, to make a row of seven ovals that go from big to small.
You can’t make a brush out of blended objects, so:
  1. Use the Expand option to turn the blend into seven separate selectable ovals
  2. Use the Group command to group the seven ovals together
  3. In the Brushes palette, select New Brush, then Art Brush
  4. In the Art Brush options, select which direction the brush should go in when you draw the line and select the Proportional option under Size.
  5. The Brushes palette will display the new brush at the end of the other brushes
From there you can either use the actual Brush tool or the Pen tool
  • Select the new art brush and make a line, or make a line and select the art brush
  • The art should follow the path, which you can modify the line, but not the actual art


Spotted Salamander

    Scatter Brush: I used a Scatter Brush for the scales on the trout and white dots on the spotted salamander. 

  1. I made a simple quarter-moon shape for the scales, and a plain white dot for the salamander markings
  2. I selected New Brush and then chose Scatter Brush
    1. With the Pen Tool or Brush Tool, draw a line and experiment with all the Scatter Brush options to find out what they do.
  3. I drew a Scatter Brush line on either side of the creature
  4. I made a copy of the creature's outline, placing it on top of the two Scatter Brush lines 
  5. I selected the outline and the two Scatter Brush lines
  6. then used the Mask command to "mask out" any of the Scatter Brush effects that fell outside the creature’s outline.
  7. You can continue to adjust the Scatter Brush lines inside the mask, the Scatter Brush options, or the mask itself.

        For the dotted feathers hanging at the bottom, I lowered the opacity 50% to make them slightly see-through with the Transparency palette.

😃

Tuesday, September 13, 2016

Recent Art

    I've added some new art and some revamped art.  I'm still attempting to capture a mid-century illustration feel, which has inspired me for many years.  It made a big comeback somewhere in the late '90s or early Y2K.  I just bought a big book about Charlie Harper and his art.  His amazing work back in the day inspires me to create art in the same vein.

    "Red Bird."  I used a limited number of minimal shapes while trying to retain the character and shapes of the bird.  I used a spattering airbrush texture to create the gritty effect seen where lights and shadows meet.  This adds some interest and creates a more traditional painted look.
Adobe Illustrator

Thursday, June 26, 2014

House Sparrow

     I captured a rather handsome house sparrow with my trusty dusty Canon Rebel XTi.  Opening the photo in Adobe Illustrator I originally aimed for a much more simplistic, cartoony bird to match other bird illustrations I've done...
Cardinal
Space
...however, this illustration grew into a contemporary retro piece.
     Sticking with simple shapes (circles, squares, lines, triangles) I decided to stay faithful to my feathered fellow's anatomy while rendering with minimal descriptionGeometric, but finessed, and daintily detailed just enough to make my sparrow recognizable and interesting. :)
Adobe Illustrator CS2

Saturday, June 23, 2012

Illustration Friday meme: Space!

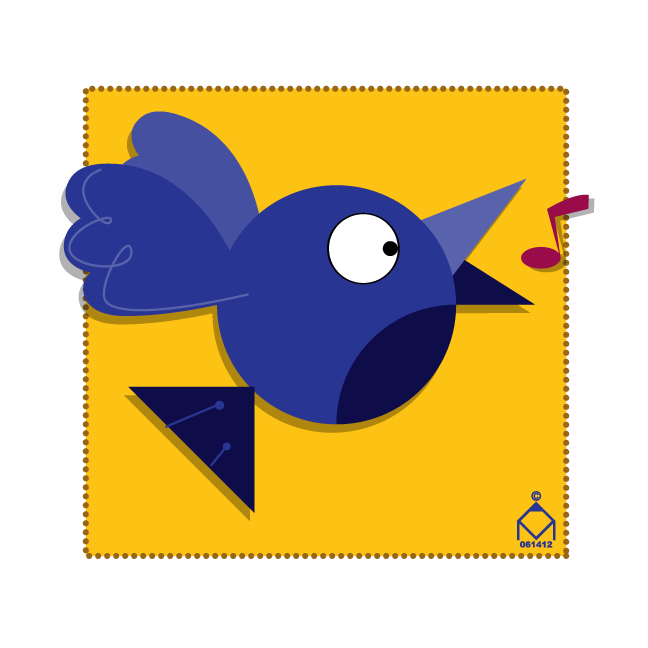
 Songbird
Bluebird

I made sure to leave a lot of space around the birds so they'd stand out. :)
Just working with simple shapes and colors.  Ever see any of the Ed Emberley drawing books?  As a kid I loved how he could create anything from a horse to a pirate ship with just the simplest shapes. :D

Adobe Illustrator CS2

Sunday, December 19, 2010

Illustration Friday-- Mail

Adobe Illustrator CS2
Tried my best to just use simplified shapes and concentrate on design, color, and composition. :)

Monday, November 16, 2009

Big Boss Man

For Illustration Friday's Unbalanced. Usually the old man gets a little crazy around mid-week, but Nerble takes it in stride.
Adobe Illustrator CS2
Adobe Illustrator /PhotoshopWeathered version: I exported the Illustrator file as a tiff, then opened it in Photoshop. I opened a photo I'd taken of a cracked asphalt sidewalk, then dragged and dropped it onto my illustration. I blended the texture into the main illustration using the Multiply filter, then manipulated the transparency until the illustration still dominated but the texture showed through just enough.
I changed the background into a layer, then added a layer underneath the illustration layer, and turned the color to brown. I erased some of the illustration layer to let the brown background show through. Then I created some additional distress drawing cracks, highlights and shadows the Dodge and Burn tools. :)

Sunday, May 31, 2009

8th Wedding Anniversary Illustration

Canon Digital Rebel XTi, 3D Max, Photoshop, Illustrator. :) Here's a submission for Illustration Friday's Drifting.

Sunday, May 3, 2009

Final Approved Blaze Logo

T-shirt front and back designs.

Mock-up of t-shirt application:
Adobe Illustrator CS2

Tuesday, September 23, 2008

Freelance t-shirt designs

Here are a few ideas I put together for a t-shirt for our church.

Close-up of t-shirt back design
There's a big sign out in front of the church which (as far as I can reckon) uses Times New Roman for the "Glenshaw" and Arial for the "Alliance Church", which I used for my version. I then used a few different offset path thicknesses to achieve the 3D effect for the logo.
I appropriated the photo of the church from their website and traced it in Illustrator.
The background came via the scribble stylize effect. Front and back
Church name logo ideas
The logo with all the symbols is the Christian and Missionary Alliance logo, which I found a big version on the web and traced.
Adobe Illustrator CS2

Tuesday, September 9, 2008

Space Cat Enters Reptile Temple

Adobe Illustrator 8/CS2
    I created this at a time when I wanted to learn cartooning. I always thought of myself as a realist and considered cartooning beyond my grasp. I really had to go back to the basics.  I looked at lots of 50's modern art, abstract art, animation, Jack Kirby, and I don't know what all, to better understand basic shapes and simplification in cartooning. 😀

DJ Spooks freelance illustration

Adobe Illustrator

I created this for a lady from Kuwait I met on Flickr. She posted a photo for me to use as reference.

When I first saw the photo, I knew exactly what I wanted to do with the glasses.
I initially traced the head and facial shapes, which looked rather random and helter-skelter when I finished. I then manipulated the shapes --straightening, rounding, simplifying... trying to unify them, creating a flow with the shapes for a more graphic feel.
I used two different halftone screen sizes for the face and the cap. The sharp, detailed, and close-up photo revealed the man's pores, suggesting to me the halftone screen as how to imitate the effect. The cap was knit, and I thought the bigger halftone screen captured the feel of it well. :)